UltraSIPS workflow
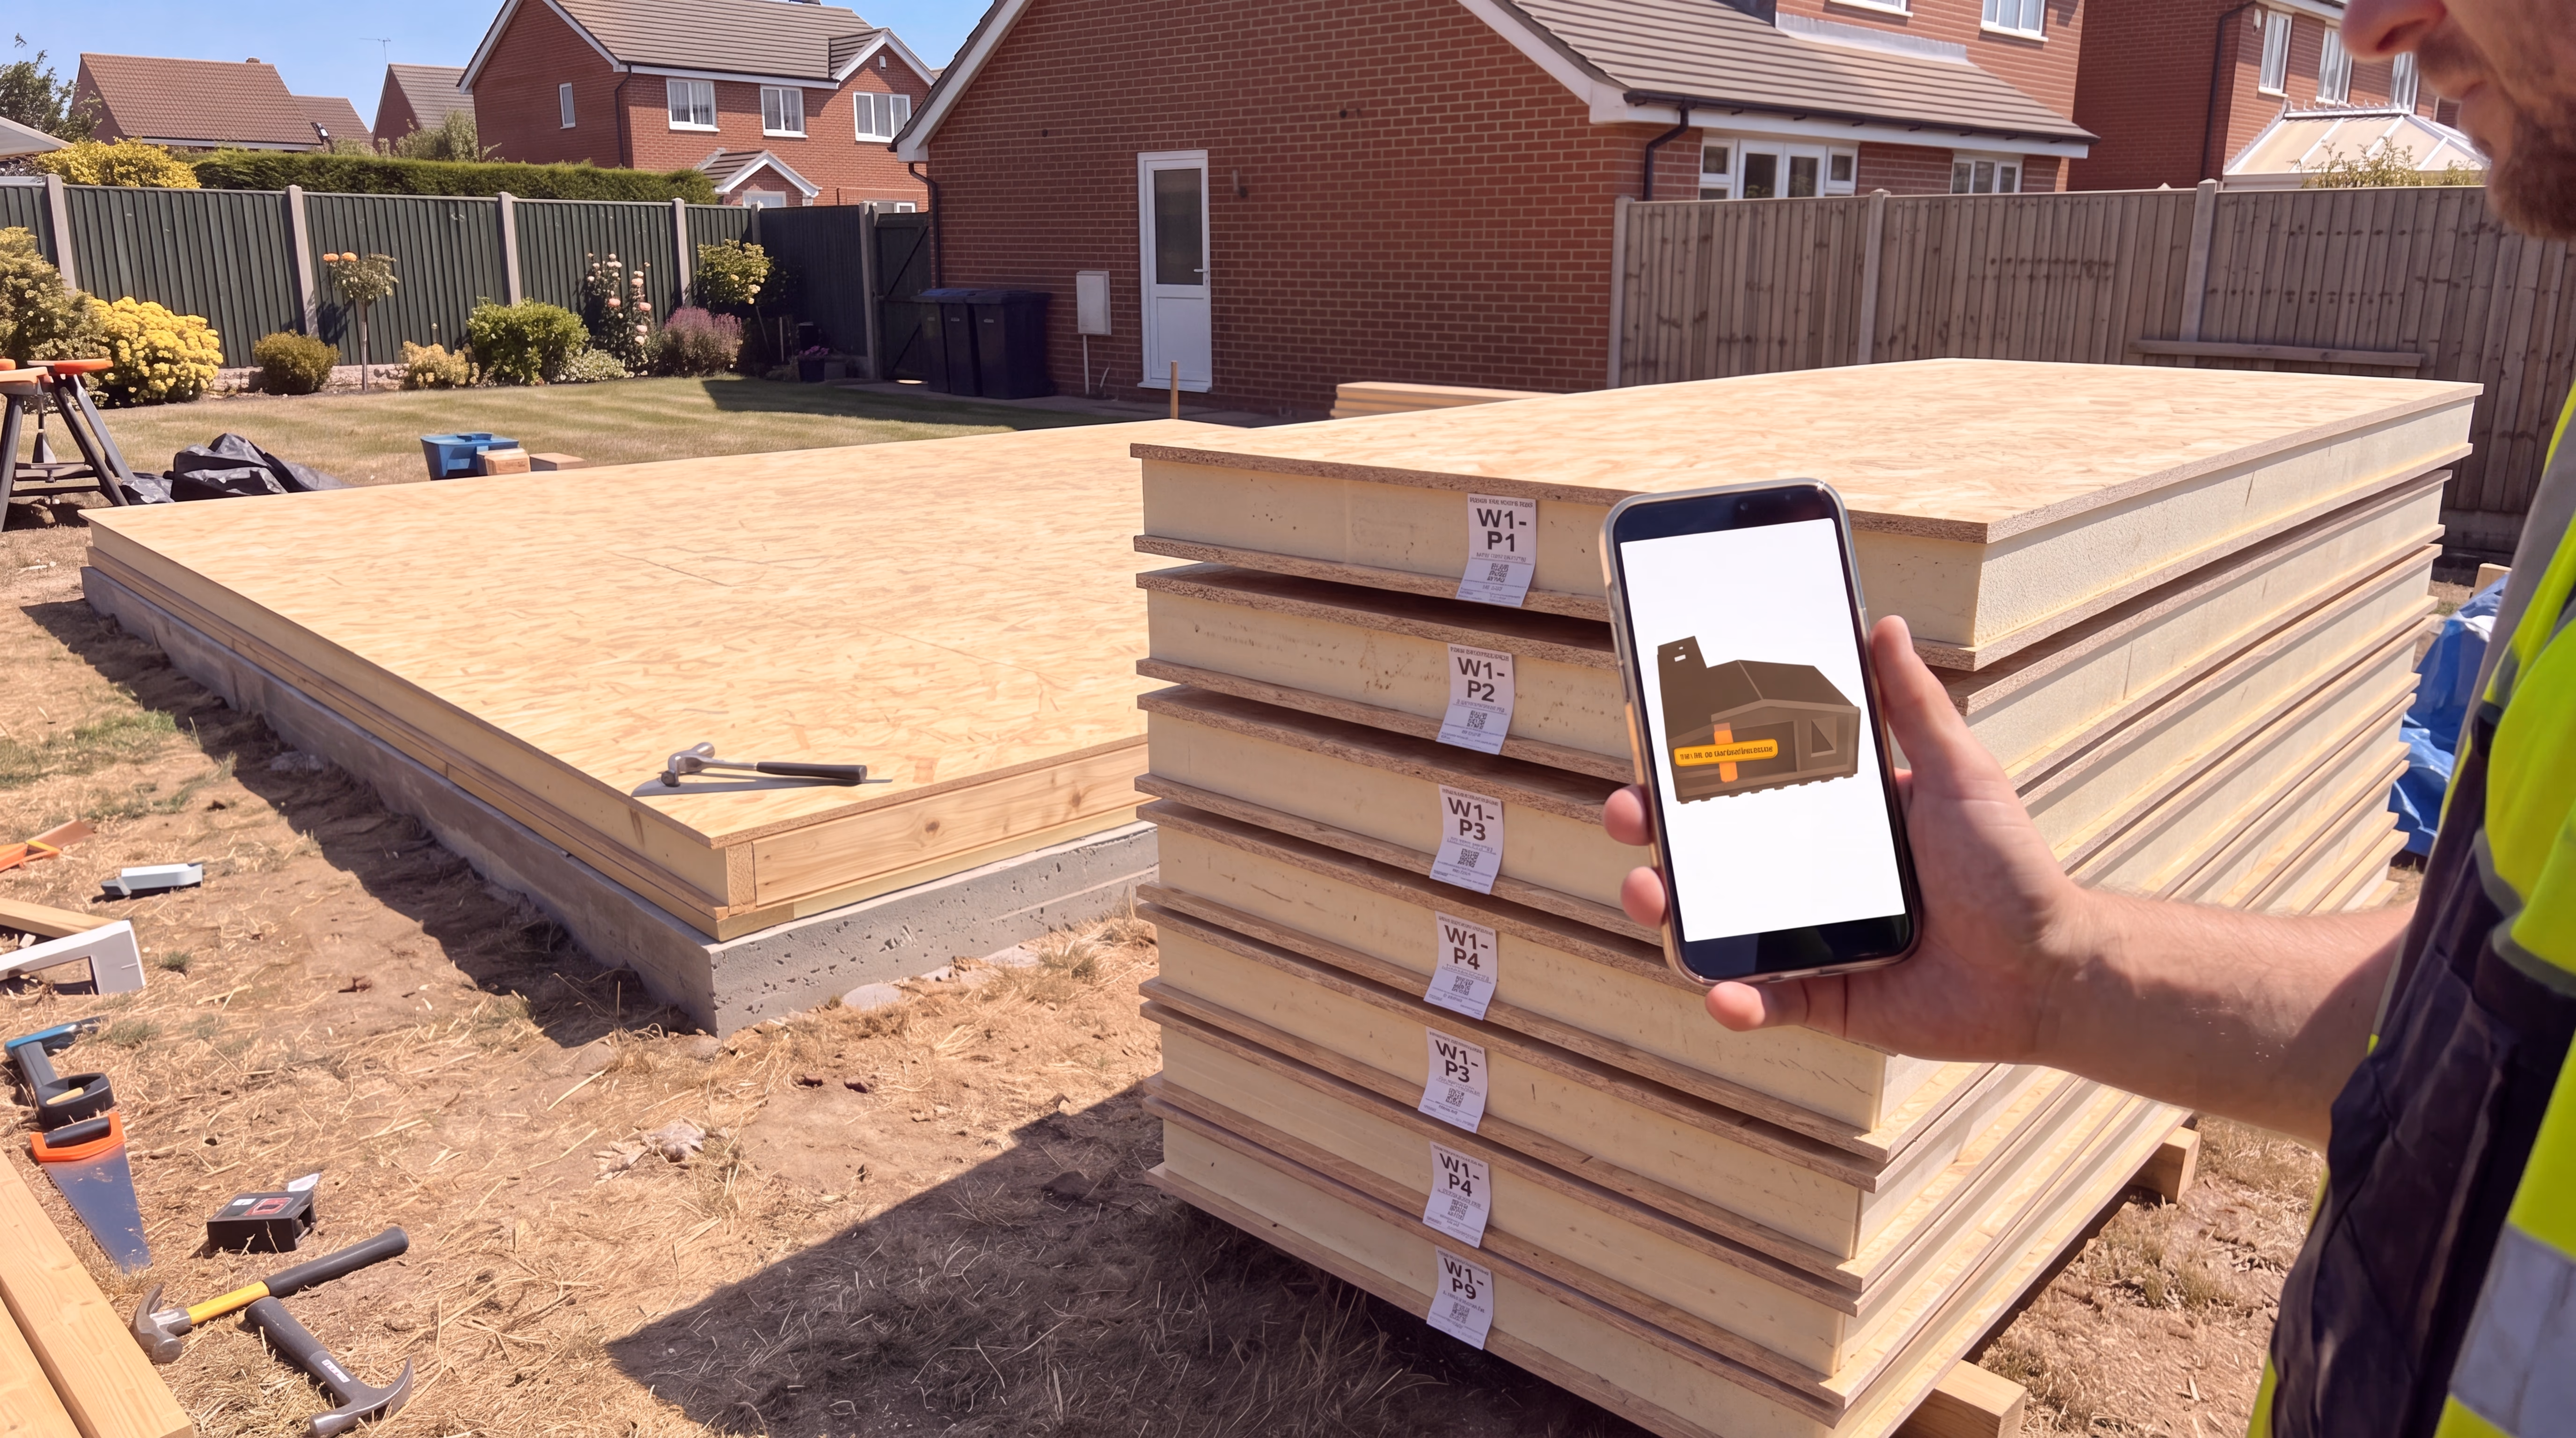
Finding the right SIP panel on site should not rely on guesswork. For custom panel-scheduled kits, UltraSIPS can label each finished SIP panel with a clear panel reference and QR code, then scan those panels into labelled stacks before dispatch.
The aim is simple: when the kit arrives, a competent DIY builder or professional installer can identify panels faster, check what stack they are in, and use the customer panel schedule to see where each panel fits in the build.
What is a QR panel label?
A QR panel label is a site label fixed to a finished SIP panel. It normally shows the panel reference, panel count, panel size, SIP thickness, schedule/order reference and a QR code. The short panel reference, such as W1-P1 or RF1-P3, is designed to be readable from a sensible distance in the workshop or on site.
When scanned, the QR code takes the customer to the relevant panel schedule page. From there, they can review panel dimensions, see production status where available, and use the 3D model viewer to locate the panel visually.
1. Each panel gets a reference
Panels are named using practical site references. For example, wall panels, roof panels and floor panels can be separated into codes such as W1-P1, RF1-P1 and F1-P1.
2. Panels are scanned into stacks
Before dispatch, panels can be scanned into workshop stacks. This creates a packing record so the team knows which panels are grouped together.
3. Stack labels help unloading
Stacks can be labelled so the site team knows what is inside each bundle. That helps reduce time spent searching through panels after delivery.
4. The 3D model shows panel location
Where a model is available, the customer panel schedule can show the SIP shell in 3D so panels can be located more easily before lifting them into place.
Example QR label
The example below is a public demonstration label. In a real customer order, the QR code opens the customer's own account panel schedule for that project.
W1-P1
2440 x 1220 mm ? 122mm SIP

Demo QR label
Scan this example
This public example QR opens the demo section of this article. On a live project, the QR code would take the customer to the correct panel schedule in their account, with the relevant panel highlighted where possible.
That gives installers and DIY customers a cleaner route from physical panel label to digital panel information.
Interactive demo model
This demo model is taken from a small internal demo panel schedule. You can rotate, zoom and inspect the SIP shell below. On customer projects, the panel schedule viewer can also be tied back to individual panel references.
Interactive demo panel schedule
Rotate, zoom and click a SIP panel to highlight it and see the panel reference and size.
Visual model only (no panel metadata loaded)
Why this helps on site
SIP kits are easier to assemble when the site team can quickly understand what each panel is and where it belongs. A labelled and scanned workflow helps with:
- Faster sorting: panels can be grouped by stack and cross-checked against the schedule.
- Fewer mistakes: the panel reference gives a simple identifier instead of relying only on measurements.
- Clearer communication: if a customer calls us, they can refer to the panel code on the label.
- Better confidence: the 3D view gives visual context before lifting panels into place.
Is this only for professional installers?
No. A professional installer will already understand drawings and panel schedules, but the system is also designed to help competent DIY customers. If you are building your own garden room, office, gym, pod or similar structure, being able to scan a panel and see its schedule can remove a lot of uncertainty.
That said, the QR label is a support tool. Customers should still follow the supplied drawings, panel schedule, structural information and installation guidance. Where Building Control, structural design, electrics, plumbing or foundations are involved, the relevant competent professionals should still be used.
What happens before dispatch?
- The panel schedule is created from the agreed drawings/specification.
- Panels are manufactured and labelled with their panel references.
- The workshop scans finished panels into stacks.
- Stack information is checked before dispatch.
- The customer receives access to the panel schedule in their account where applicable.
Important: this workflow is used where a panel schedule is produced and the project is being supplied as a labelled kit. Full-board-only orders and simple material-only orders may not need the same level of QR panel tracking.